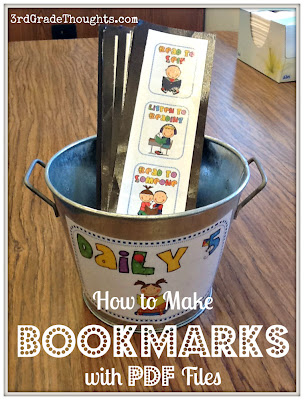
My finished Daily 5 bookmarks looked like this:

Next year, I am going to redo them using my own Daily 5 Signs. These are available in my TpT Store in a HUGE assortment of colors. This tutorial is going to take you through the plain bookmarks, but you could use any color and even mix-and-match them if each center were to be its own color (ex: Word Work is red and supplies are found in a red tub, Teacher Time is purple and you store your items in a purple tub and folder, etc.)
First, from the pdf, go to File-- Print.
The screen will then pop up, looking something like this:
 |
| Click to enlarge |
 |
| Click to enlarge |
 |
| Click to enlarge |
 |
| Click to enlarge |
First, pick the pages you want to rotate through. For my example, using the plain signs, I want kids to rotate through pages 59-63 (Read to Self through Work on Writing). I am going to type those pages into the "Pages" section, separated by commas:
 |
| Click to enlarge |
For the second rotation, I simply delete the first page number (in this case, 59) and then add it to the end of the list of pages, separated by a comma:
 |
| Click to enlarge |
Now, print off the quantity needed and get ready to print Rotation #3.
For this rotation, I am going to do the exact same thing as before, but this time bring 60 to the end, so that my pages to print will read "61,62,63,59,60":
 |
| Click to enlarge |
Now, all you need to do is cut each bookmark out (VERY easy to do with a paper cutter since they all have the same margins!), mount them on construction paper, and laminate them. You could also print them out onto cardstock and laminate them.
I have used this printing strategy for several other pdf's in my collection- this way kids get to see each poster in a compact, easy to use size and it makes it a breeze for me to pass them out and collect them!
I hope you enjoyed this little tutorial and that you now have loads of bookmarks on your to-do list :)


If I knew this was so easy, I would have done this a long time ago. I just made brand new Daily 5 bookmarks the long way measuring my boxes and placing them up and down.
ReplyDeleteWOW!! Thanks for sharing this tip, I'm going to have to play with this on my printer and see if it works for me.
-Lovely Nina
Lovely Little Learners
Hi Nina,
ReplyDeleteI am so glad this helps you :) I can't cut a straight line to save my life, so when I discovered this tip, it was a total lifesaver!
Thanks so much for your comment :)
~Stephanie
totally brilliant Stephanie--THANK YOU!!!
ReplyDeleteThanks for sharing!! I can't wait to make some great bookmarks!!
ReplyDeleteThanks so much for the tutorial! I am going to try to make some bookmarks for next year!
ReplyDeleteShelley @ Rhymes with Purple
http://purplepolkladots.blogspot.com
P.S. Not sure how to make a link back to my blog here in the comments. If you, or anyone, know can you please let me know in the comments on my blog, please.
Love this!!! What a great idea and who knew it was so easy...
ReplyDeleteThat is awesome!!
ReplyDeleteAdventures of a Third Grade Teacher
This is also a great way to conserve paper because you can print two-four worksheets on one page if the print is big enough. I do this with my library newsletter when it runs long and with worksheets I use for lessons because I make copies for the whole school. You can also do a similar technique when printing from Word. LOVE being green. :)
ReplyDeleteI am learning so much! Thank you for sharing your expertise! The tutorial was so interesting an helpful...my technology class in university consisted of learning how to run a ditto machine. Photocopiers were a novelty!!!!
ReplyDeleteI can see using this a bunch of different ways!
ReplyDeleteThis is so very helpful! Thank you for sharing!!!!!
ReplyDeleteThank you so much for this tutorial!!! I feel so excited. Can't wait to show my teachers on Monday.
ReplyDeleteIrene Zajac
I absolutely love finding out new ways to make bookmarks and use technology!
ReplyDeleteThanks so much for sharing and the pics...step by step.
My printer doesn't give an option to select pages. It only offers a range. Any suggestions?
ReplyDeleteAwesome and so hopeful. Thank you!!
ReplyDelete